Saturday, June 16, 2012

Tacky Tie Challenge


So here is the the Totally Tacky Tie that I received.  You have to love the Christmas Trees.  I thought and thought about what to do with this beauty.  As stated in my Facebook Post this morning my first attempt was a major "craft fail"!!  I wanted to decoupage a frame to use with a Christmas picture...but contrary to some things I have read online my first attempt was just not pretty - the Mod Podge just darkened the tie and it looked blotchy.  Thank goodness I used one of Dan's old ties to practice with.  Then I was in the shower - I do some of my best thinking here - and it came to me.  I had saved this tutorial on a "Prickly Posie " flower and I thought my tie would be perfect. By the way the complete tutorial can be found at Freckles and Fun.
They did a fabulous job on the instructions.  
First I cut my tie open and I was amazed at the inside pattern
The pattern is completely different from what I expected  - so always check you might have a great creative surprise waiting for you.  I cut 25 - 2" circles out of the tie.  
Perfect for a 1 1/2" pin base.  
The circles are folded and then snipped and this is what you end up with.
You squirt a little hot glue in the center and then pinch them into a little bundle.  
Start on the outer edge of the felt circle, place them around and around one row at a time.
This is the great flower you end up with.

 I was feeling rather festive so I decided to add a few jingle bells to complete the holiday theme.  This pretty flower can be used as a pin or attached to a canvas bag, or even used as a bow for a package.  
Thanks for stopping by.  Make sure you check out the other designers on The Little Blue House blog for their creative ideas.  
Elaine

Friday, June 8, 2012

Front Porch Friday-Playing with Paper Dolls

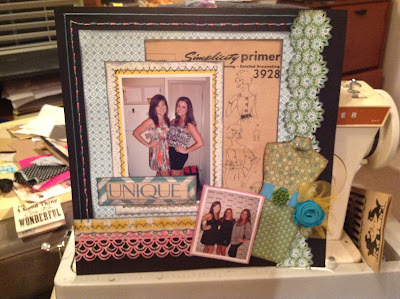
Who doesnt love playing with paper dolls?  The Sew Artsy kit was perfect for just that.  The dress form that is included in the kit was my inspiration.  I originally thought I would do a mini book of different dresses but that just wasn't working for me.  I often look through pictures when I "hit the wall" in designing.  I found this picture of my daughter Kristen and her roommate Shirley playing "big girl" dress up their freshmen year of college and I was off and running.
I took the dress form and traced it onto chipboard so that I could create several bases.  With all of the fabulous fabrics that are included in the kit I was was able to create my dresses.  Using a tacky glue like Helmar 450 on the form I just places the fabric on the forms and trimmed away.  There are so many wonderful trims to use for embellishing.  Here's a close up of two of the dresses...


On this dress I used the paint chip that is included to make her belt and made the ribbon rosette from the zipper.  Her necklace is the little spool covered in you guessed it glitter!! and threaded onto the floss.  Sorry I can't share more closeups but my hard drive crashed and yep...my photos are gone.     
Will need to take some once I get to the Little Blue House.
So don't delay ...there are only a few kits left...head over to The Little Blue House Online and get your kit today.  Make sure you check out the online gallery for all the other great projects.  And since today is Front Porch Friday-Check out the other designers blogs for their special posts.  Well I am off to Art Group at the LBH..can't wait. 
Keep Creating
Elaine